
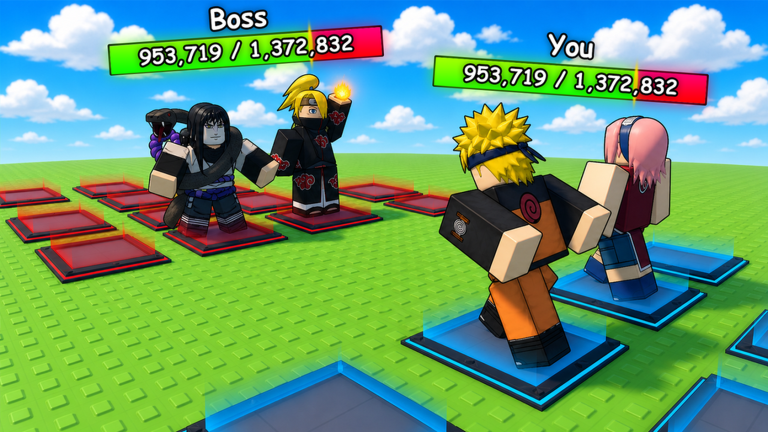
Start with the public loop
Use the five-system sequence as an orientation aid
The description moves from rolling to team building, merging, waves, and checkpoints. Mutation collecting spans that loop as a collection goal.
Pause after each system and compare the current state before moving on.
- 1Roll
Read the current roll result and its visible labels.
- 2Team
Place the fighters you want to evaluate together.
- 3Merge
Confirm the current merge prompt before committing inputs.
- 4Waves
Watch Team HP, enemy progress, and boss state.
- 5Checkpoint
Read the live reward prompt at the checkpoint you reach.
Acquisition and lineup
Read a roll, then give the result a team context
A fighter result becomes easier to evaluate when you compare it in the same team and battle conditions.
 Official experience media
 After a roll, record only labels and appearance details you can see in the current game. The public APIs do not expose a durable fighter roster, so a third-party name or tier should not replace the label shown by the live interface. If the result has a visible mutation or growth marker, preserve the exact in-game wording rather than assigning a category from promotional art.
Place the result into a controlled lineup. Keep the comparison conditions as similar as practical: same checkpoint, similar wave context, and the same surrounding fighters. A single changed slot gives you a cleaner signal than replacing the entire team and trying to guess which change mattered.
- Capture the current resultNote the visible name, level or growth marker, appearance, and any mutation label actually shown in the interface.
- Choose one comparison questionFor example: does the team survive longer, clear the same enemy state more comfortably, or preserve more Team HP?
- Change one slotHold the rest of the lineup stable so the new fighter’s contribution is easier to observe.
- Repeat before concludingOne promotional frame or one lucky run cannot establish a general stat rule.
Growth state
Treat merging as a verified goal with live requirements
The description explicitly says merging levels fighters, while public sources remain silent on the required count, cost, eligibility, and formula.
 Official experience media
 Open the current merge interface and read every requirement before using a fighter. Confirm which inputs the interface accepts, what output it previews, and whether the action is reversible. This wiki cannot safely replace those prompts with a fixed recipe because the first-party public data does not publish one.
After merging, compare the exact displayed growth state and battle behavior. The approved Level 1/67 image is promotional evidence that visible leveling exists, not proof that 67 is a permanent universal maximum or that every fighter follows the same path.
- Confirmed
- Merging fighters is connected to leveling them in the official description.
- Observed
- Approved media includes a Level 1/67 promotional comparison.
- Not published
- Merge count, input rules, currency cost, success rate, level formula, or universal cap.
Battle progression
Use wave, Team HP, boss, and checkpoint feedback together
The public description calls the enemy waves endless and connects higher checkpoints with rewards. It does not enumerate a full progression chart.
 Official experience media
 | Moment | Read in the current interface | Do not infer from sparse public data |
|---|---|---|
| Before a wave | Current lineup, visible growth state, mutation labels, and Team HP. | A fixed optimal team or hidden stat formula. |
| During enemies | Wave label, enemy state, damage feedback, and Team HP movement. | That one damage number applies to every fighter or wave. |
| At a boss | Boss bar, opposing pads, and whether the lineup maintains progress. | An unpublished boss name, fixed HP, or complete encounter table. |
| At a checkpoint | The live reward prompt and the new checkpoint state. | A reward for checkpoints not shown in the current game. |
| After a change | Difference from the controlled comparison you just ran. | Causation from several simultaneous lineup and growth changes. |
A durable method
End each session with a small evidence log
A short, consistent record is more useful than a large spreadsheet filled with assumptions.
- State before the changeRecord the visible lineup, growth markers, mutation labels, checkpoint or wave context, and Team HP display.
- One actionRoll, swap one fighter, merge through the current prompt, or compare one visible mutation state.
- State after the changeRecord the same fields and note only the difference you directly observed.
- ConfidenceMark a result as a one-run observation until repeated under similar conditions.
| Field | Example of a safe entry | Unsafe leap |
|---|---|---|
| Context | “Same checkpoint and surrounding team; one slot changed.” | “This is the best team.” |
| Visible state | “Interface displayed this level and mutation label.” | “The label implies an unpublished rarity rate.” |
| Battle result | “Team HP remained higher in two comparable runs.” | “The fighter has a universal hidden multiplier.” |
| Source | “Current interface on the observation date.” | “A promotional number is a permanent base stat.” |
Walkthrough questions
Frequently asked questions
Where should a new player begin?
Begin by reading the current roll and team interfaces, then use the official description’s roll, team, merge, wave, and checkpoint sequence as an orientation map. Make one controlled change at a time. The walkthrough deliberately avoids prescribing a rigid route because no first-party source publishes one mandatory order.
Can this walkthrough give an exact merge recipe?
No. First-party public sources confirm that merging levels fighters but do not publish the required number of inputs, costs, eligibility rules, success behavior, or formula. The current in-game merge prompt is the reliable source for those mutable requirements, so read its preview before committing a fighter.
Does Wave 67 mean there are exactly 67 waves?
No. One approved promotional image visibly contains a Wave 67 label, while the official description calls the waves endless. That frame proves the label appeared in official media; it does not define a final wave, full reward table, permanent milestone, or route that every update must preserve.
Sources
Last verified: